Blogg

Blogg

torsdag 2 maj 2024

Birthday card for a friend

Hello and welcome, 

Today I want to show a card that I made for a friend’s birthday. 

A while ago I mentioned that I used the same background technique’s for three cards. This is the second card. I have used Tim’s products for this card. 


I made the star with Tim’s Vault rosettes 666567 die set from Sizzix. I love this star die! 🌟 For the background have I used the THS174 stencil, Texture paste opaque and platinum embossing powder.


The wreath is from Vault funky floral wreath, 666563. 


I used Distress spray stains (Uncharted mariner and Rusty hinge) on Watercolor cardstock on the background. I also spritzed some drops of Distress Oxide spray Speckled egg on the background. 


I colored the paperdolls with Distress crayons. 


I adhered the card to a piece of sanded metallic Kraftstock.


I finished off the card with a Quote chip label and a piece of ephemera snippets number strip. 


I will try this card in a challenge over at Simon says stamp Monday challenge - Feminine.

Thank you very much for visiting my blog, 

/Susanne

onsdag 1 maj 2024

Celebrare 60 years of engagement

Hello and welcome, 

Today I want to share a card that I made for my Dear parents who have been engaged for 60 years the last of April. 🎉🌟❤️. Next year they celebrate 60 years of marriage).

I have used Tim Holtz products for this card.

I started to cut a piece of designpaper from an old cherished stack - French industrial. I used some crackle paste through the THS017 Hearts layering stencil. Let air dry. Then I scribbled a Distress watercolor pencil on the hearts, then used a wet paintbrush to spread the color in to the cracks. 

Then I used texture paste opaque through the THS033 Valentine stencil and quickly added some Walnut stain embossing glaze on the paste. Let air dry, when dry I used my embossing tool and heated the glaze. 

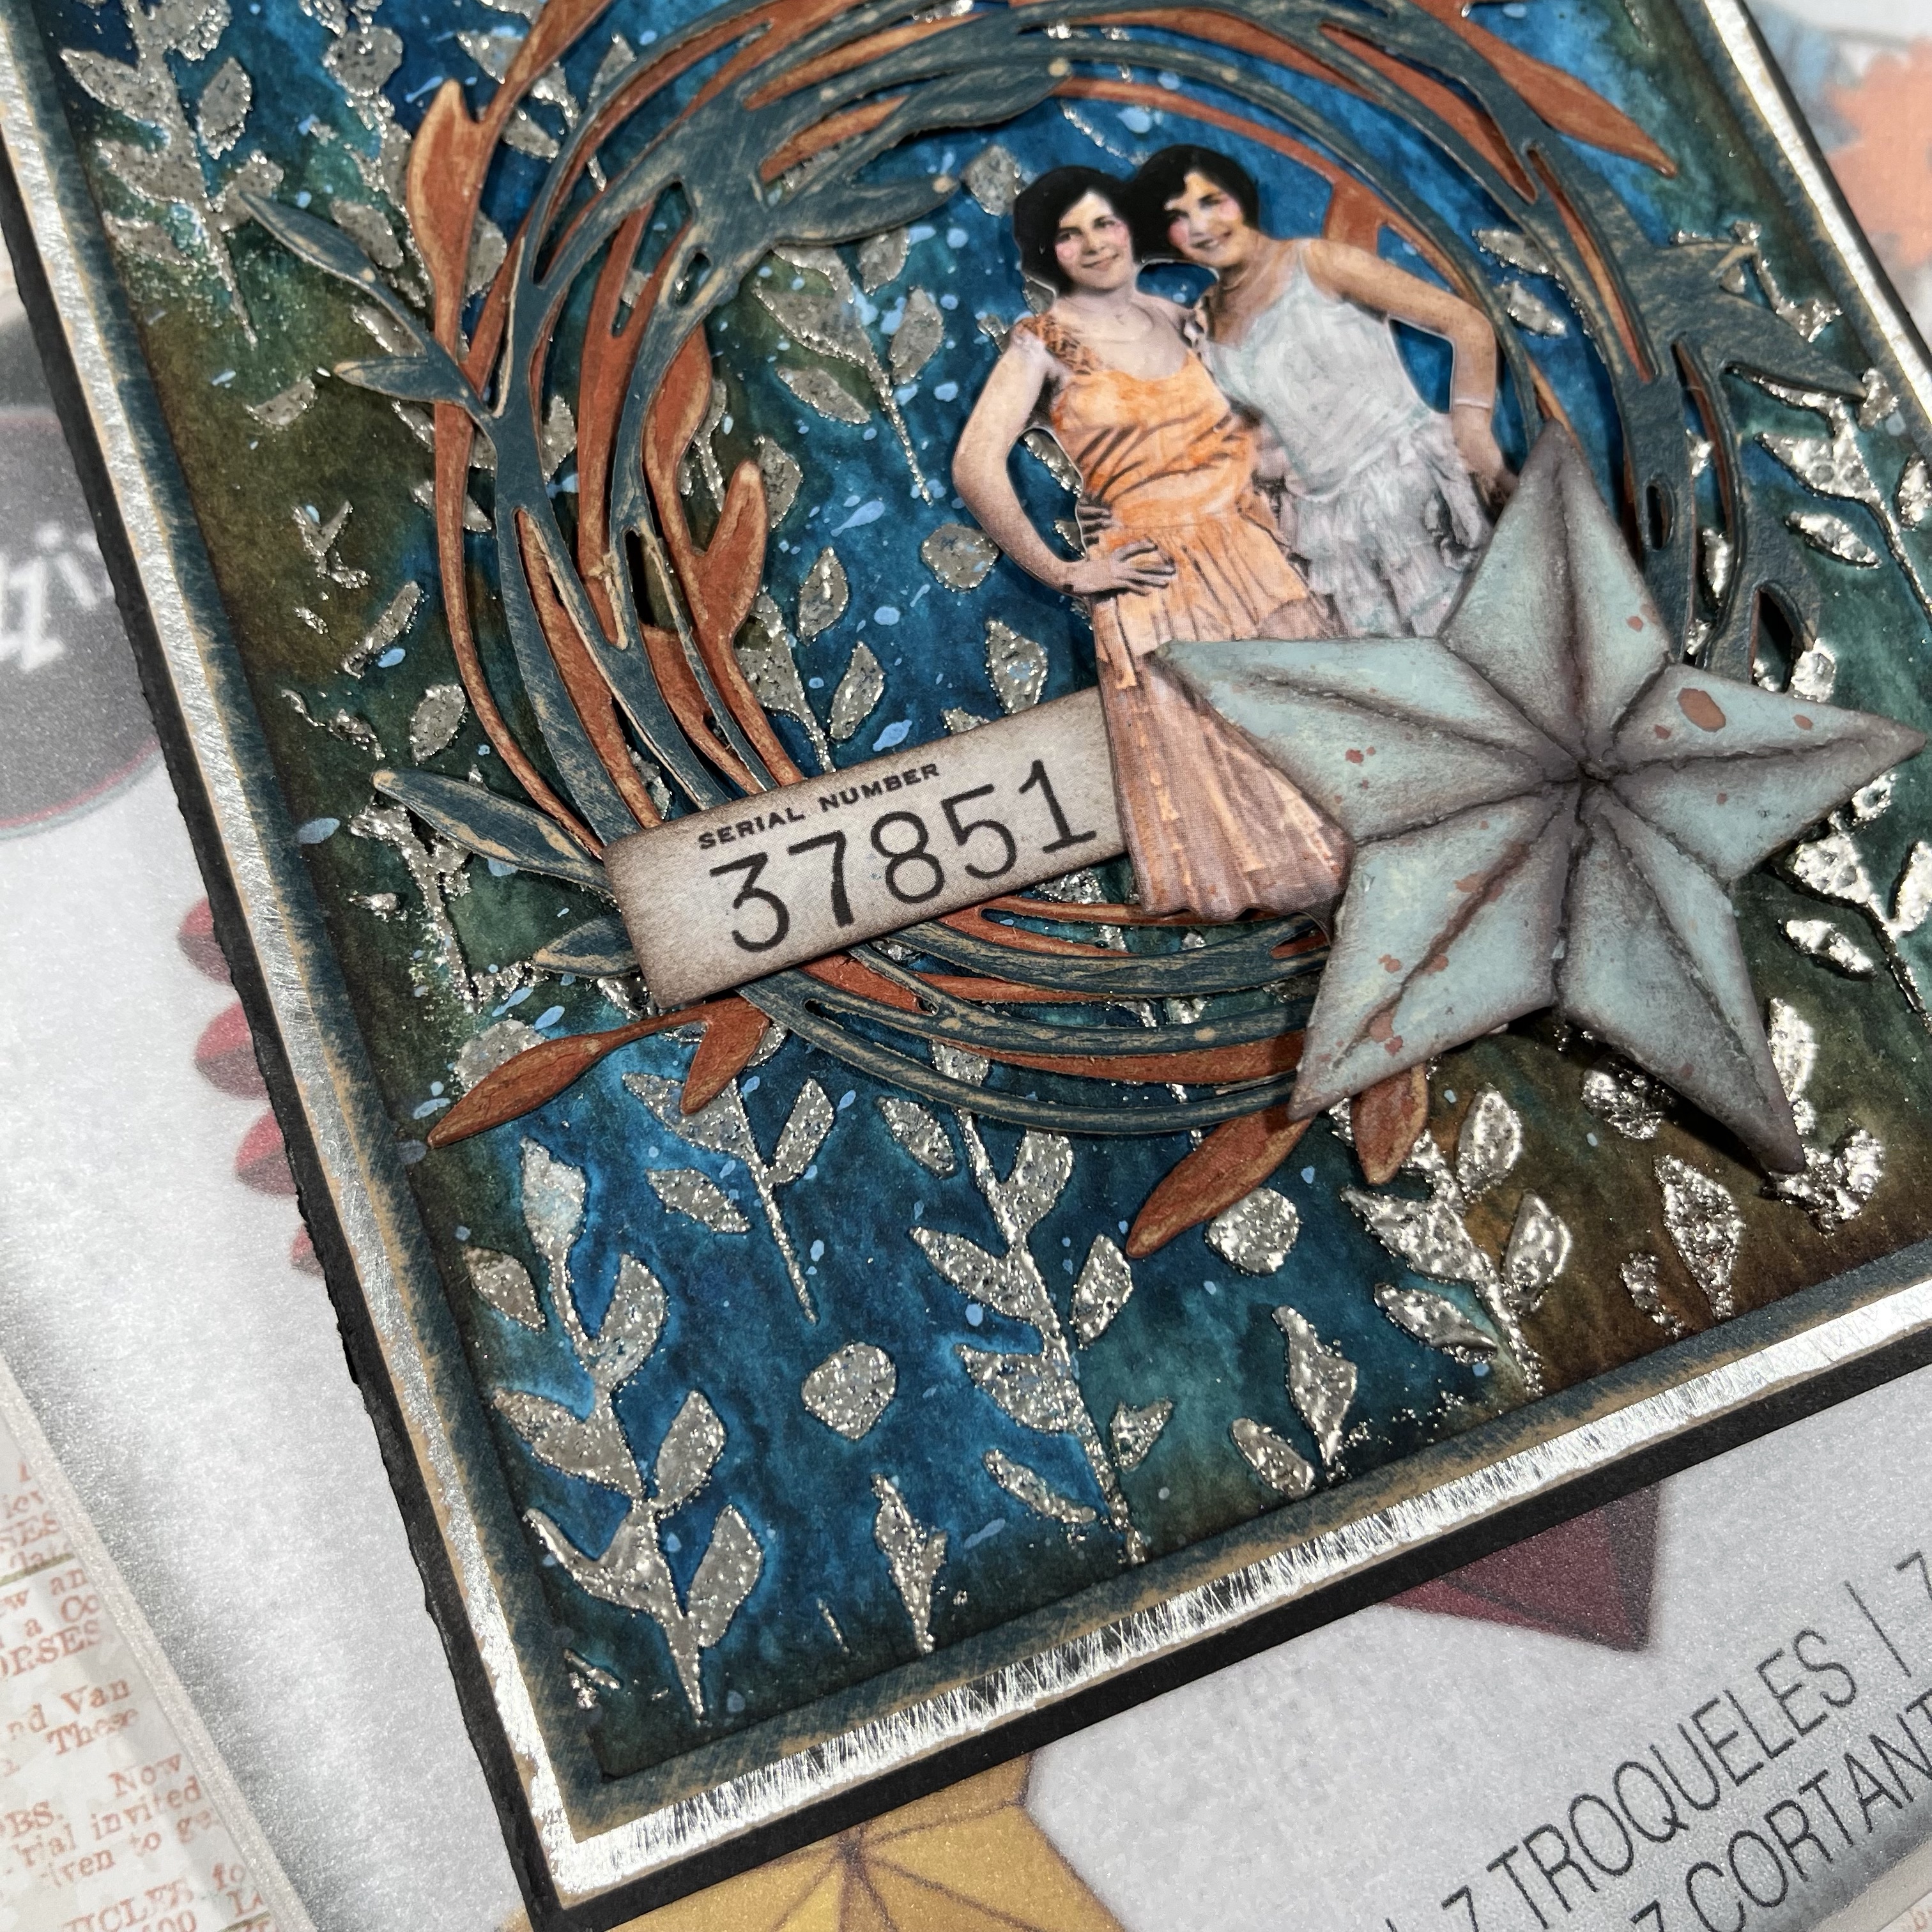
I also stamped some images from the CMS396 Field notes stamps with Scorched timber DI. Inked the edges with the same DI and stitched around the edges with my sewing machine. 

Time for the rosette 666567, I cut the pieces from the same paper as mentioned above. Inked the edges with Scorched timber DI. For the circle in the middle of the rosette I used CMS460 Tiny prints in the background and the small flowers are from Field notes. Then I stamped the quote from CMS463 Quote notes with Scorched timber DI and added clear embossing powder. Heated. Inked the edges on the circle. 

Then I cut 60 from Ideaology Kraftstock, inked the edges. I adhered the 60 with 3D foam.

Before adhereing the rosette I glued some Mica tiles behind the rosette. Added two Hex fasteners, a big in the lower left corner and a small one in the upper right corner.

Here you can see the shine from the Mica tiles. 

I cut a piece of Ideaology Kraftstock, sanded and inked the edges and adhered the card to. Then I made a card blank from a piece of older sanded Ideaology Kraftstock. 3D foam between all layers for dimension. After I took these photos above, I decided to add some small hearts.


I cut three small hearts from sanded Ideaology Kraftstock with 660953 Crazy things, and added to my card.

Thank you for visiting my blog, 

/Susanne


mÄndag 22 april 2024

Thanks

Hello and welcome, 

Today I will show a card made with Tim’s new flower stamps. I made this card for a friend who surprised me at work last week and bought me lunch. 


I started with the background, a piece of Watercolor cardstock. I used some Distress spray stains (spiced marmalade and crackling campfire) and some Distress Oxide sprays (Spiced marmalade, Crackling campfire and Picked raspberry ). Added some water, dried and repeated to build up some layers. Dried between the layers with my heat tool. 

I stamped some different stamps on the background with Archival ink, Black soot. Stamp set that I used: CMS412 Examination (the dots). CMS478 Mr Rabbit (the “grid”). CMS479 Abstract florals (“Thanks” and I also stamped the roses (the pistils, so I don’t have to fuzzy cut them). 


It is hard to see on the photo, but I used another stamp from CMS412 in the lower right corner. Then I used crackle glaze through THS183 Deco feather stencil. Let air dry. I inked the edges with Black soot DI and stitched around the edges with my sewing machine. 


I inked the flower stamps from CMS479 Abstract florals with Black soot Archival ink and stamped them on Watercolor paper. I colored them with Distress watercolor pencils, fuzzy cut and inked the edges with Black soot DI. Then I aligned them to the already stamped flowers and glued them to the background. 


I found two pieces of Ideaology Ephemera snippets Curator in matching colors and fastened them with a mini paper clip.


I cut a piece of pink cardstock and inked the edges with Scorched timber DI, then made a lilac cardblank, inked the edges with the same DI. I used 3D foam between all layers. 

I will try this card over at Simon says stamp Monday challenge - Make your own background. 


Thank you very much for visiting today, 

/Susanne 

mÄndag 4 mars 2024

Birthday card for Berit

Hello and welcome, 

This is a birthday card I have made for my Mothers former colleague. She turned 89. 

I started with the background which I made three from. So this is the first card. I used watercolor cardstock and the THS174 Berry leaves stencil, texture paste opaque and in this case gold embossing powder on the paste. Let dry, then emboss with embossing gun. 

Then I sprayed the background with Distress Oxide sprays in Frayed burlap and Cracked pistachio, and some water. Dried with heat gun. Added som Distress spray stain in Rusty hinge on random places, added som water and dried. I also splattered some Rusty hinge stain on the background. 


I die cut a bird from 665861 Silhouette bird from Watercolor cardstock and used the same sprays as mentioned above. I used a black fine liner pen around the edges on the bird and also gave him a little eye. 

Then I cut a panel from Watercolor paper and stamped one of the flowers from CMS462 Bold botanicals with Embossing ink, added gold embossing powder and heated. I colored the flower with Distress inks. Also inked the edges with DI Ground espresso.

I cut two panels from sanded and inked (Ground espresso DI) metallic paper. I adhered the panels with 3D foam. Then I cut a green sanded an inked panel to place behind the flower and another for the entire background. Then I cut a lighter green card blank, and inked  the edge. 

I made a “Grattis” (means congratulations in Swedish) piece from my Dymo label maker and layered the same way as the flower motive. I used a Tiny clip to hold it to the card. 


I put a Hexfastener in the lower left corner on the “flower pice” and a velvet ribbon around the background. Then I adhered all pieces in place with 3D foam. 


I will try this card in a challenge over at Simon says stamp Monday challenge - Fur or Feathers. 

In the near future I will share the other two backgrounds I started, to show how different one can make from the same beginning.

Thank you for visiting, 

/ Susanne 

mÄndag 19 februari 2024

Birthday card with Distress pencils

Hello and welcome, 

While waiting for the new Distress pencil sets to arrive I used the one’s that I already got. 
I made this background with inspiration from the very talented @marlydesign, you can find her on Youtube.
I used the Botanical embossing folder and Watercolor cardstock. Inked the edges and raised areas with DI Scorched timber. 


The stamped image is inspired from Tim’s Youtube live when he demoed the Distress pencils 2. I have used set number 1, 2 and 3, since I don’t have the last three sets yet. After I stamped the “Distress pencil colored” image I stamped the “happy birthday image” stamp with CMS460 Tiny prints with Distress Oxide in Scorched timber, and then used my stamp platform and stamped onto the image. Then I used a thin pen and drew around all words. 


I inked the edges with Scorched timber DI, then adhered with 3D foam to a piece of sanded Ideaology Kraft stock. 


I stamped a small number stamp from CMS396 Field notes, with Black soot Archival ink in the lower right corner.


The card is mounted to a piece of the same Ideaology paper as mentioned above, then mounted it to a black card blank.


Theses are the colors I used from the pencils: Picked raspberry, Seedless preserves, Kitch flamingo, Villainous potion and Fired brick.

Thank you for visiting, 

/Susanne 

torsdag 15 februari 2024

Valentine card for my Dear husband

Hello and welcome, 

Today I will share my Valentine card for my Dear husband. I wanted to make a ”grungy” card and then the new Distress color Scorced timber arrived, so off I went.


I started with the background, a piece of Watercolor cardstock, then used Distress texture paste matte through the THS033 Valentine stencil. Before the paste dried I used embossing glaze in Lumberjack plaid. Let dry and then heated with my embossing gun. 


Then I sprayed the background with Scorched timber Spray stain, and water until happy. Dried with my heat tool. I sprayed some water drops and dried again. Repeated until happy. I also stitched around the edges with my sewing machine, with red thread. Inked the edges with Scorched timber Distress ink. 


Then I diecut the heart from Watercolor cardstock with 666852 Lovestruck Colorize. Inked it with different colors of red Distress inks and glued them together. Inked all edges with Scorched timber DI. 
I spritzed some Spray stain on the heart as well. 


The “XOXO” piece is cut from the background before adhering the heart. I inked the edges and glued it on the heart. Then I used my Dremel tool and drilled a small hole through the heart, for the Vignette hardware nail. I used some Distress collage medium in the hole to be sure that the nail will stay in place. 
The here is adhered with 3D foam for dimension. 


I mounted the card on a piece of red sanded and inked piece of Ideaology Kraft stock, then to a brown card blank. Inked the edges. I used 3D between all layers.

Finally I wrote my “Love message” for my husband. We have been together since we both were 17, and last year we celebrated 40 years together. Time really flies. I really treasure my life together with my “Sweet Valentine “. 

Thank you so much for visiting, 

/Susanne


torsdag 1 februari 2024

Valentine - Love with all your heart

Hello and welcome, 

February already…

Here comes a tag I have made for Valentine.


I have used the Microglaze technique on the background.

Remnant rubs resist technique. 

The heart is from the new Vault series, Rosettes.

I cut out the text from the tag, then cut it again from inked Watercolor cardstock, and glued the letters in the cutouts of the tag. 

Some paperdolls, stickers and velvet ribbon as decorations. 

I will try this tag in a challenge over at Simon says stamp Monday challenge - Have a heart.


Products used: 

Dies: 665925 Bold text #2, 666567 Vault Rosettes

#8 Mixed media tag, Remnant rubs Speciemen and Numbers, Distress Microglaze, Distress inks, Distress Oxide, Watercolor cardstock, Element stencils Freight, Transparent wings, Metallic stickers Quotations, Paperdolls Mini


Thanks for your visit, 

/Susanne